Creation of quality content is only a fight of half way. The other half is also releasing it at the right time, the right channels and at the right time. Regardless of how luminous the blog posts or social media updates are, without a well-laid plan, they will get lost amidst the commotion. Having a well-constructed content calendar can serve as your roadmap and have every piece of content have a purpose and a deadline. However, when this process is manually handled it can get out of control and more so as your team increases.
Soundness of knowing what the distinction between a calendar and a scheduler is
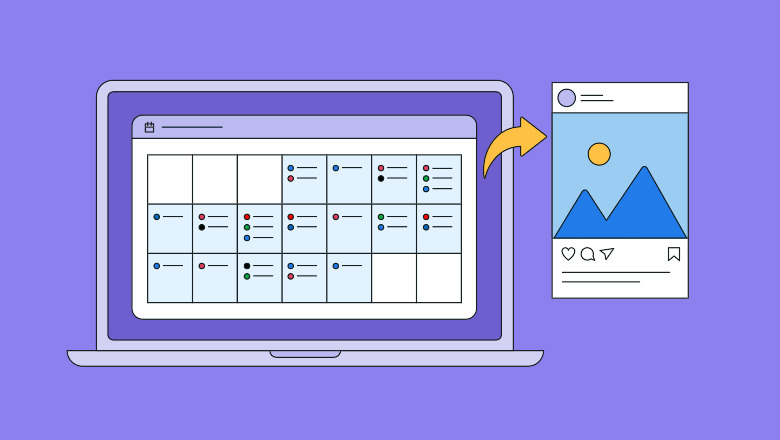
People who create content mix with a content calendar, which is considered a scheduling tool, but they are not the same. A content calendar is a visual planning tool, typically as a spreadsheet or a board, which details what you will publish, when and on what platform you will publish. It will hold your ideas, key words, campaign dates and team members that will be responsible. The other motor is a content scheduler which will put those plans into action. It is connected with your social networks, blog CMS or email service which allows you to write posts and have them automatically published.
Step 1: Figure out Your Content Objectives and audience
You ought to know what it is that you have to accomplish before you can at least get one date on your calendar. Would you like to get more traffic to the site, generate leads, get more engagement or become a thought leader? This will enable you to decide on what you are about to create; even at what speed depending on your objectives. At the same time, create an in-depth audience profile. An example is that a B2B audience will be more likely to be more engaged with LinkedIn articles on Tuesday mornings, and to be more engaged with Instagram posts on Thursday evenings.
Step 2: Choose what you want to Ideal Content Scheduler to Your Requirements
All the scheduling tools are not equal. There are those who are good at social media management, others at blog automation and a few are a combination of the two. When it comes to teams, consider collaboration tools that will enable one to comment on threads and endorse the workflow. Budget is also a factor: the free versions may have a restriction of how many scheduled posts or accounts there are.
Step 3: Brainstorm and Contents Themes Organize Material
The random posting will lead to piece meal messaging. Rather, make a calendar based on repeating themes or content pillars. An example would be; a marketing blog would have a Tool Tuesday where software reviews would be done, Data Thursday where case studies would be reviewed and Weekly Roundup where a weekly review of the blog would be done. Themes facilitate easier brainstorming of ideas in batches and to maintain a good balance of promotional, educational and entertaining content.
Step 4: Populate Your Calendar with Ideas and Deadlines
And time now to fillin the dates. Start with pre-programmed events: product promotion, holidays, industry meetings or regularly scheduled campaigns. These deadlines will be filled backwards to assist in setting up the writing, editing, design and review dates. The state of every piece of content (idea, draft, reviewed, scheduled) and its owner should be determined.
Step 5: Take Advantage of Automation capabilities of your Content Scheduler
The time savings will be achieved by taking advantage of the automation features of your content scheduler. Write a set of posts which you can use every month or even every week: a series of tips to share once a week or once a month or a welcome message to new followers. The bulk add post option will give you the opportunity to add your post in bulk and the tool will determine when to best post using past engagements. This feature is also available in many schedulers, which have recommendations on the best time to post, based on data on the activity of your audience.
Step 6: Collaborate and Effective Delegation of Work and tasks
Content calendar is a team work. The writers, designers, videographers and managers all require an insight into the due and the time. The content scheduler you use should be able to allow access to the posts by roles: the editors are the ones who approve of the posts, the contributors are those who submit posts in draft form, and the admins are the ones who keep an eye on the entire pipeline.
Step 7: strategize on the Posts to be done on the various platforms
You are planning / preparing your content and have your team ready, so it is time to put all your content and your team into the scheduler. On every piece, customize the captions, hashtags and photos on each platform, what works on Twitter may not work on LinkedIn.
Step 8: Monitoring, analyzing and optimization of performance
Did scheduled posts with respect to the manual posts perform better? These will have inbuilt reporting mechanisms that will indicate reach, engagement rates and link clicks by time and day depending on the specific content scheduler. The information will assist you to maximise your future schedule.
Conclusion
In order to design a successful content calendar, there is no need to be perfect, but, instead, he/she should be persistent to design a winning content calendar. By establishing clear goals, laying down themes and filling dates with purpose, you can come up with a system that will help reduce the last minute panic and increase quality. But the actual game-changer is to have a good sound content scheduler into your work-flow. It makes the dull automatism, invests in responsibility and leaves your mind free to be creative.